I'm all about putting some kick in your step with this DIY project...literally! And let's be honest. We are all superheroes; it's about time our shoes reflect that too. Am I right or am I right? For all those wanting to channel your inner Jessica Jones or Super Girl or Beyonce, these DIY Superpower Shoes will do all the talking necessary. Keep reading below for this quick and "POW!"-erful fashion statement...
Showing posts with label accessories. Show all posts
DIY Superpower Shoes
Saturday, January 30
Wednesday, September 23
Somebody say candy dots?! This DIY clutch is inspired not only by those color coated mounds of pure sugar, but also by this bag by designer. I saw it in a fashion post by CarrieC a couple weeks bag and fell in love. What else was I to do than try to make a spin-off? Here it is folks...fun, quick, and easy!
What you'll need:
-solid color bag/purse/clutch
-semi-circle wooden dots
-markers
-strong glue
Instructions:
1. Color your wooden dots as desired using markers. You could also spray paint them, but given that I made these while on vacation, I didn't have the option. Using a marker means essentially no drying time, but also means a less than perfect color coating.
2. Align the dots on the bag as desired. Drop a dot of glue on the base of the wooden semi-circle and press onto the surface of the bag. Hold for at least 15-20 seconds, or until glue has dried enoughto keep the wooden circle secured.
3. Continue gluing dots to your heart's content! Let the bag sit for an hour or two to ensure the glue dries thoroughly. Then, hit the town and buy some sweets to stuff it with! :)
Labels:
accessories,
color,
colorblock,
diy,
handmade,
polka dots,
purse,
sweet
Saturday, August 1
1. Aldo Bossy Clutch Bag from Asos | 2. High Waist Aqua Skirt from Asos | 3. Snuggle up to Saturday Sweater from Modcloth | 4. Come Full Cycle Swing Dress from Modcloth
Tuesday, April 28
I've got some exciting news for you all! A few months ago I met (via Instagram) the very talented Fisayo (@loveohlou) who is a student in Fashion Design and the owner/visionary behind the Oh Lou shop. Other than her skilled fashion drawings, she is largely known for her colorful, confetti filled (litterally) hair bows! Naturally, when she approached me about working together on a project, I couldn't help but say "yes!"
An important facet of her work is to connect her success to improving the community around her. She began the #SilverSpoonInitiative, which supports the Washington D.C. homeless population by providing a food bank with a non-perishable food item for every accessory purchased. Her clever motto, "Buy an accessory, give a necessity," sums it up perfectly. As some of you may or may not be aware, my entire introduction into creative work (sewing, DIY, photography, etc.) began similarly like Fisayo, with an interest in making something original and using that work to improve the lives of those around us. It is perhaps the best combination of self-motivation: to challenge yourself creatively and to believe creative solutions can have positive impacts in the world.
Labels:
accessories,
artists,
bows,
collaborations,
etsy,
fashion,
instagram
Wednesday, April 22
People...I've had these DIY Embroidered Yarn Bracelet Sandals in my head for nearly a year (!!) and I finally found the perfect materials to put it together! You probably think I'm a bit crazy, but seriously, I've been dying to make these! I've had the fortune to travel many places around the world and I made it a tradition of mine to collect yarn bracelets from each country as a keepsake. When I was younger, I used to wear all the bracelets and they became excellent conversation starters! Now that I'm living the professional life, I had to put them aside but still like to memorialize them in some way. The best part about these sandals is that they can be meaningful if you'd like them to be!
Sunday, January 18
First DIY of the new year and it involves two of my favorite things: staying warm and emoticons! This super simple project was inspired by Studio DIY's Emoji Ornaments she made over the holidays. Given how much I love to use emoticons with my friends every day, I figured, why not share them with the rest of the world? Scroll below for the deets on how to make these interchangeable DIY Emoticon Earmuffs!
Here is what you will need: solid color earmuffs (yellow or white works best!), large clear plastic buttons (with pin backing - like these), colored paper, markers, scissors and glue. All these supplies I got at Michael's!
To start, open up a plastic button. Remove the sample paper inside and use that circle as a template. Trace 4 circles on the sheet of yellow paper; these will be the bases of your emoticons. Depending on which smiley you wish to re-create, you can cut and glue more shapes using different colored pieces of paper. for example, to make the 'tongue sticking out' emoticon, I cut a small circle out of white paper for the open eye and then I made the tongue by cutting out the shape on pink paper. Glue everything in place if you add pieces like these. Next, finish the emoticon with black marker to do the eyes, eyebrows and mouth. Once the emoticon is complete, simply place it back into the plastic button case with the emoticon facing outwards. Gently, pin the button to the outside of the earmuff so that it is firmly attached. Make sure you don't do this while the earmuffs are on your head (which would be both quite dangerous and quite difficult)!
Continue making as many other faces or emoticons as you wish! The joy of using plastic pin buttons is that you can switch them up anytime! Feeling happy one day - pin on some laughing emoticons. Feeling sad it's so cold you need to wear earmuffs in the first place? Pin on some grumpy ones! When it warms up outside, you can easily pin these to anything else - clothes, backpacks, purses, or notebooks. Have fun and feel free to share what you think or made!
Labels:
accessories,
diy,
earmuffs,
emoticons,
winter
Tuesday, December 30
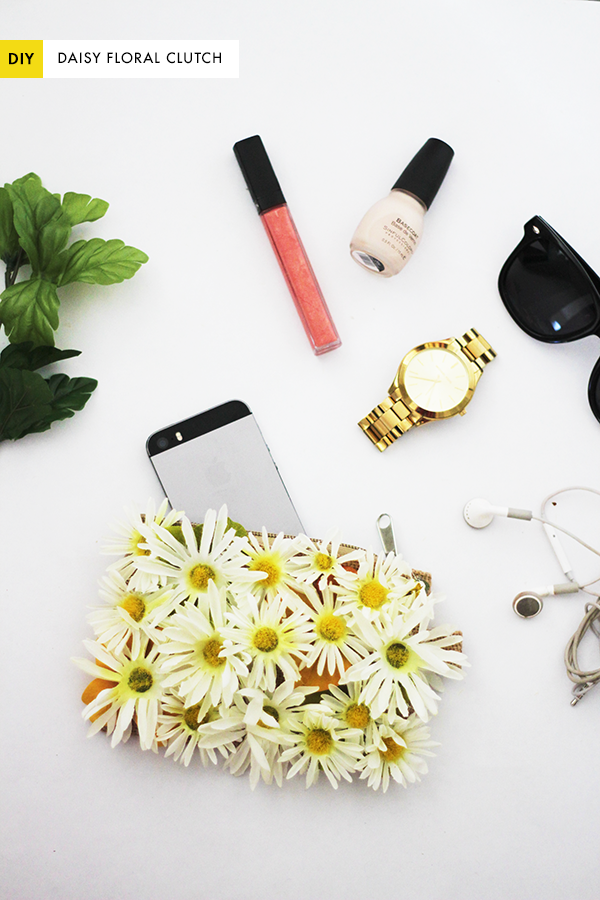
Alright, so this DIY was supposed to be a stocking stuffer but, alas, Christmas proved to be much more hectic than I planned! However, I bet there are some of you that forgot to gift something to that distant cousin who showed up unexpectedly for the holidays and now you're scrambling to put something together..or maybe, over Christmas, you became one of the lucky few to get a plane ticket present to welcome the New Year on a tropical and peaceful island. Regardless of what you'll need it for, I'm back with a DIY that is both classy and quick to make - a leather passport case with gold lettering! Read below for the easy step-by-step instructions...
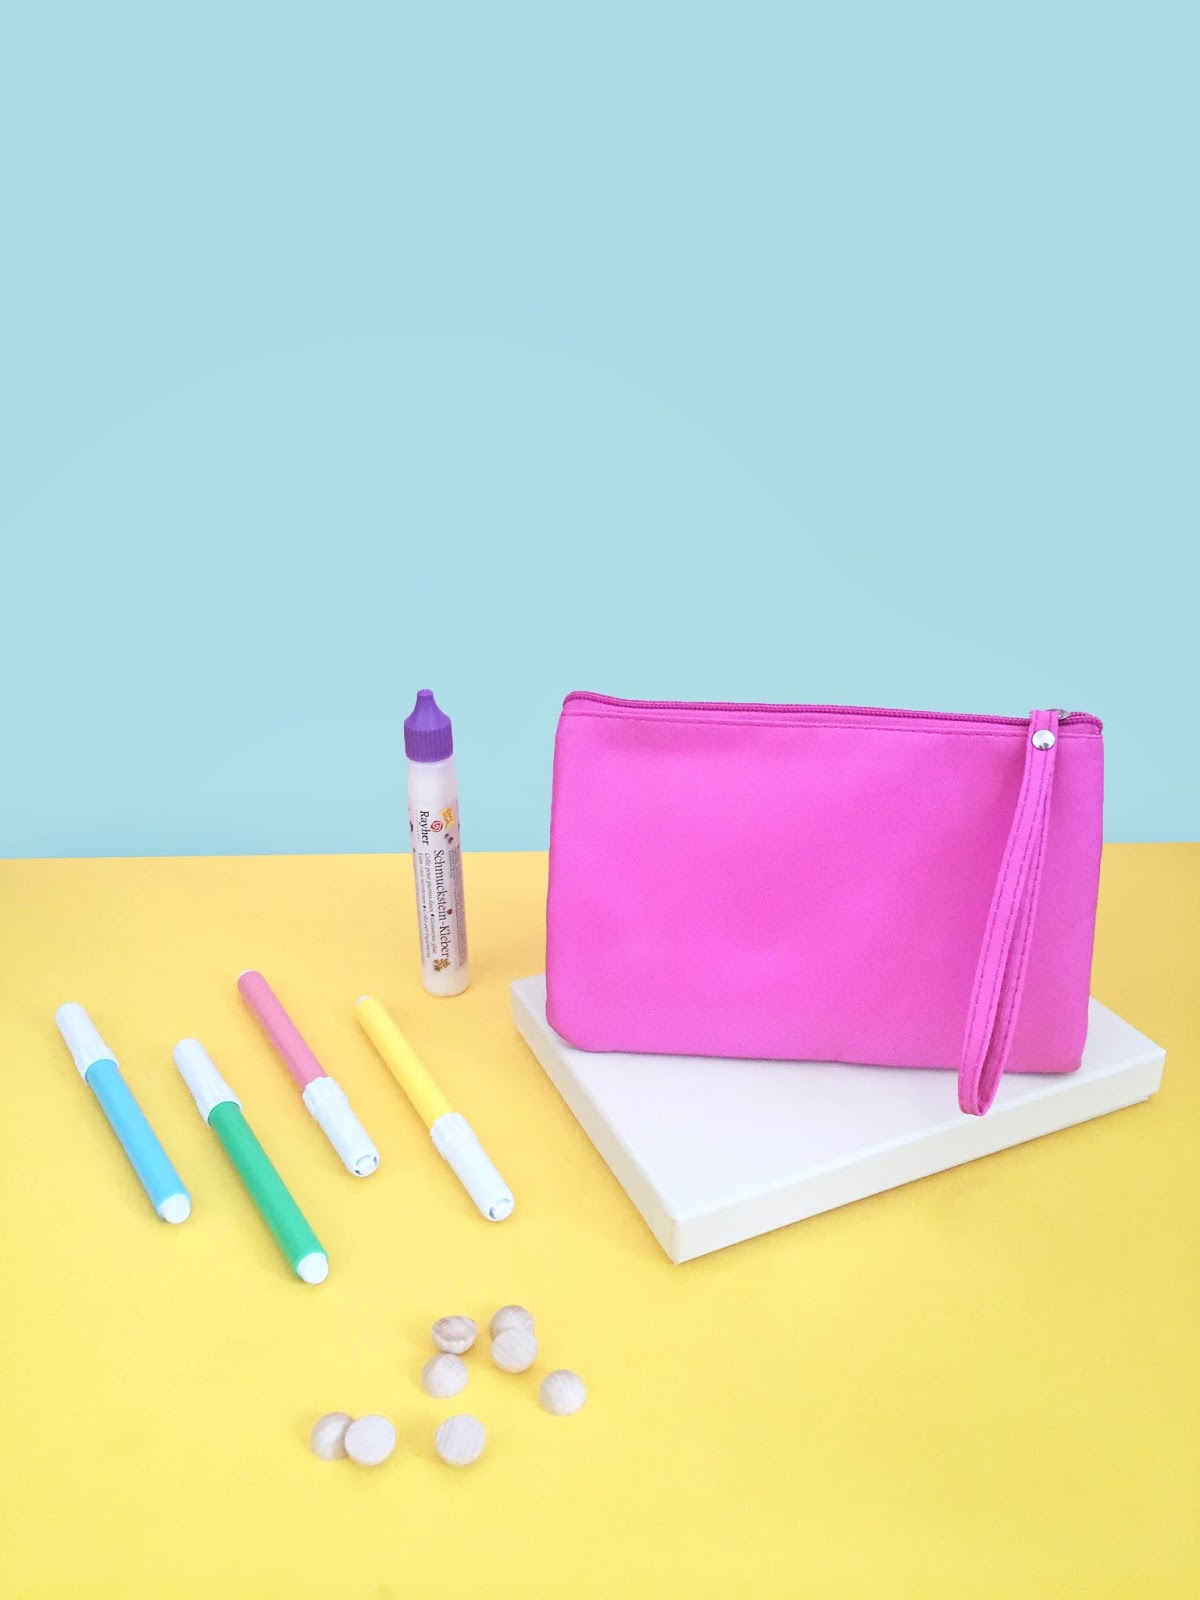
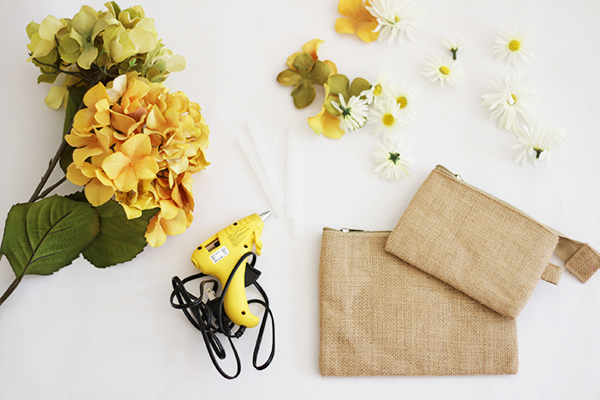
What you'll need: Leather swatch (got mine in aqua color at Michael's), Letter stamps (purchased at Michael's), Gold Marker Pen, Permanent Glue, Scissors, and passport/pencil for sizing.
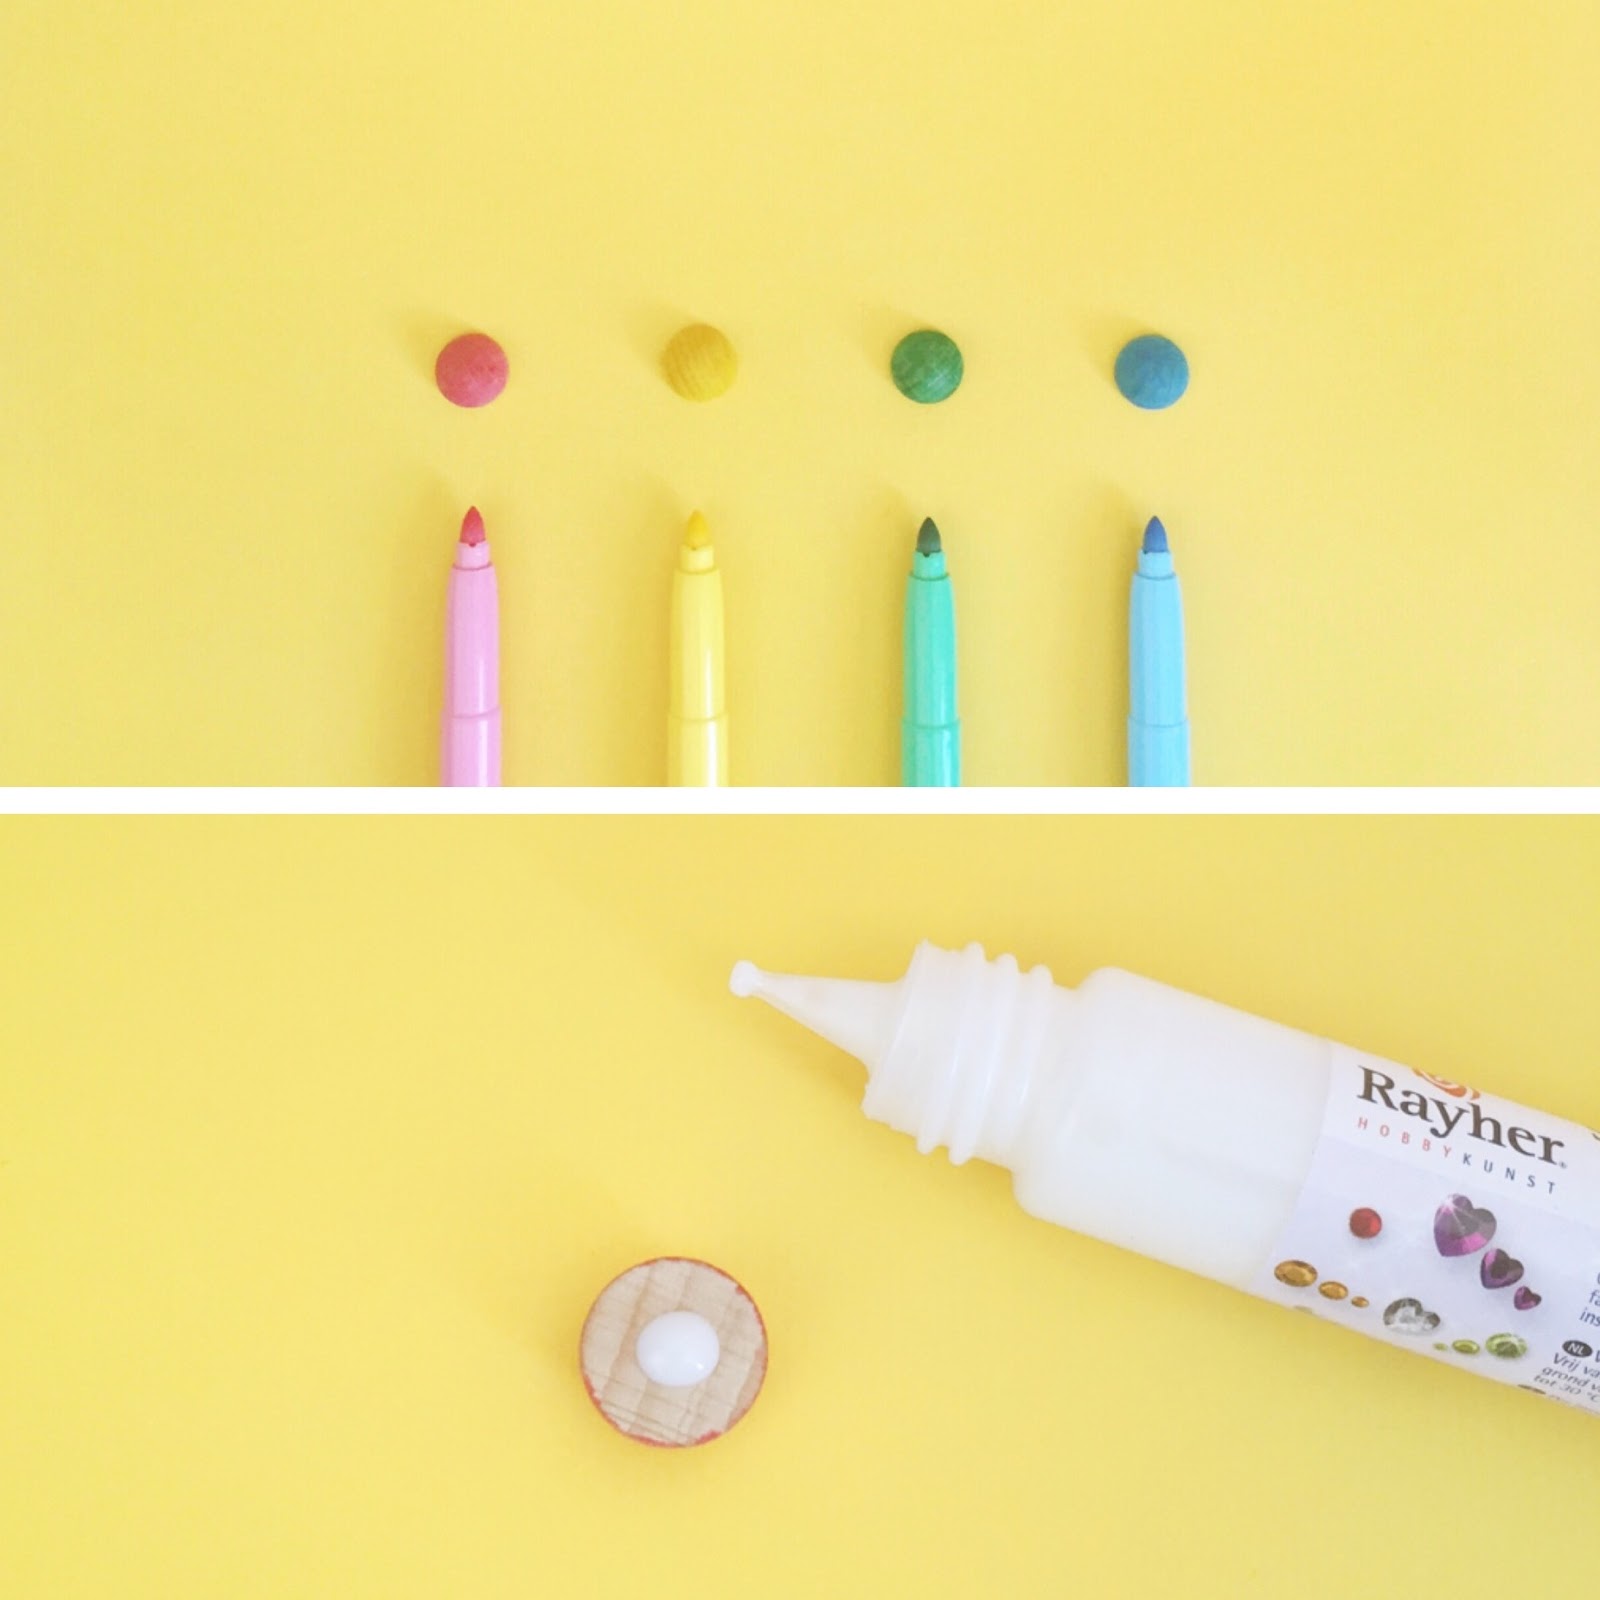
First, layout you passport on the inside of the leather swatch, drawing a light trace around it with a pencil. Next, trim the swatch so there is about 1" extra across all sides, with an extra .5" especially on the vertical sides in order to make flaps (this will make sense in the pictures). Afterwards, taking one side, fold the leather over the front cover of the passport, dotting glue on the corners. Repeat with back page of the passport. Be careful not to glue your passport to the leather! It should fit snug in the leather but also loose enough to take it out. Repeat adding glue if the leather doesn't stay down at first and lay under a stack of heavy books for a couple hours until it keeps its shape. Alternatively, for the sewing inclined, you can stitch the flaps under a sewing machine for a sure hold. Once that is set, simply take your rubber letter stamps and, one by one, coat a letter using the gold marker pen and press hard into the leather. Write whatever you wish! That's it!
Follow my colorful mess on some of my newest social media accounts: instagram and twitter, and let me know what you think!
Thursday, December 4
Welcome to part one of a three-part series on affordable holiday stocking stuffers made with leather! It's been hard getting back to the blog after trying to sift through the mayhem that is applying to medical school. Yet, with the holidays in full blast I couldn't help but craft all the project ideas buzzing in my head!
This first project, DIY leather coffee cup sleeves, is a chic (and fairly hipster) project that looks and feels quite luxurious but only cost me around $6-7 to make. That's a steal! As a California gal living on the east coast, I don't do well in the cold. I also don't do well with wasting things. Although many paper coffee sleeves in cafes are recycled, why not just have a reusable one you can easily carry in your bag or wallet? Better yet - snag a reusable coffee mug and you'll essentially save the world (and look good while doing it).
Alright, here are the deets!

What you'll need: paper coffee cup, coffee cup sleeve (as template), leather (I got mine for $3.99; here is a similar one online at Michael's), permanent glue, scissors, and a pencil.
How to make it: trim the paper coffee cup sleeve on each end so it will fit nicely on your leather sheet. Flip the leather over and trace the outline of the paper sleeve lightly. Cut! You'll notice that the leather sleeve at this point won't wrap all the way around. Obviously, if you have a longer piece of leather this won't be a problem, but mine wasn't. So I saw it as an opportunity to keep being artistic with it. To fill this gap, use a piece of scrap leather, flip it over for an 'opposing' color/texture look, and glue to both ends of the sleeves. Trim excess as necessary. I then wrapped a bit of the excess around the top and bottom of the sleeve to complete the look. Wait at least 10 - 15 minutes for the glue to dry and harden before using. That's it! Happy sippin' folks! And come back next week for second DIY in this leather stocking stuffer series!
Saturday, August 30
I know, I know...I'm just as obsessed with florals as I am with polka dots. Forgive me! I couldn't stray away from making this Daisy Floral clutch after walking through Michael's and seeing tons of summer floral bouquets on sale now that fall is approaching. This project is incredibly simple to make, and I was inspired by previous wonderful projects done by Chic Steals and Design Improvised. Definitely check them out for more ideas! There is so much creative flexibility with making a floral clutch so definitely tweak it to your own style and go crazy! See below for the easy step-by-step directions...
What you'll need: plastic flowers (I used daisies and yellow/green hydrangeas), plain clutch bag/purse, hot glue gun and glue sticks, and scissors.
First, make sure to cut the stems of the flowers so they are very short and can be glued flat onto the bag. Next, place a few hydrangea flowers on the clutch to set a colorful base and then glue them on. Begin gluing daisies directly on top of the hydrangeas, then glue more daisies until you fill the rest of the open spaces on the bag. This particular bag had a long zipper that stuck out on the end, which I didn't like very much, so I simply tucked in the excess zipper and glued it to the inside of the clutch. That's it folks! Hope you like it, and let me know if you try it out yourself!