DIY || #22 || Eco-Friendly Plastiband Charger Decorations

Wednesday, May 22

Refresh your mac chargers using colorful plastibands - no more washi tape!

Pardon my slight delay with DIY projects this past week -- it's my senior week before graduation so I've barely had time to even upload pictures from my camera! Alas, here is this week's DIY which was totally inspired by all things summer, sorbet, and fresh. I'm not quite sure what to call it - is it an embellishment, a decoration, a...colorful thingy? Whatever it is, I decided to spruce up my mac chargers using these vibrant plastibands. I saw them by the check out counter at Blick's Art Supplies and Materials in Boston even though I didn't know what to do with them. I can't remember the last time I actually used rubberbands, but given how colorful these are I just had to find a way to put them to (consistent) use. Inspired by all the Washi Tape charger embellishments (though not pleased with the prices of washi tape!), I wanted to mimic that look using summer flavors. It's such a simple project (took me less than 5 minutes from start to finish) and it is completely customizable based on how you want it to look. Also, apparently, these plastibands are latex-free, 3X stronger than rubberbands, and recyclable - making them much healthier to use for both yourself and the environment (at least that's what it says on the package). Here is what I came out with, let me know if you try it too!
Refresh your mac chargers using colorful plastibands - no more washi tape!

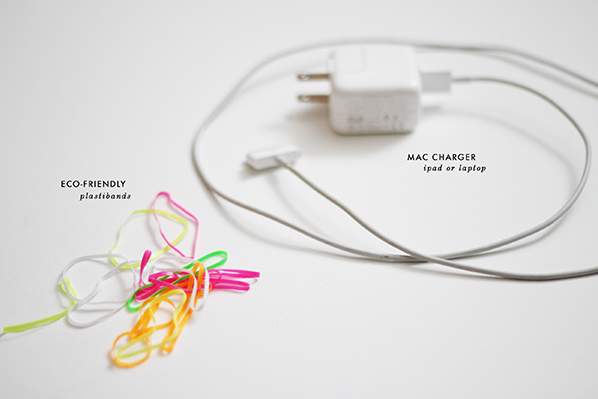
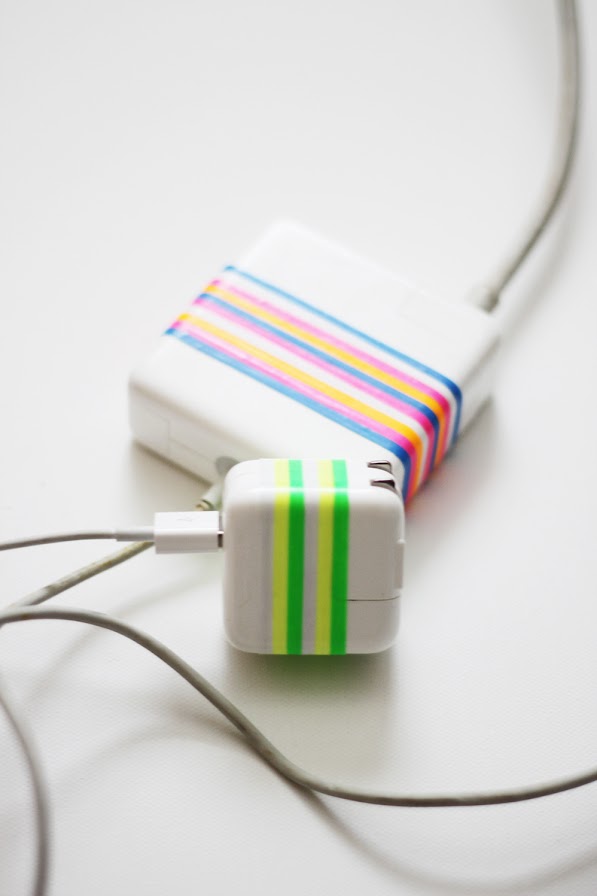
Simply unplug the usb cable from your iPad charger and begin sliding on the plastibands. I did each color twice to make the strips appear bigger. Decide on a color pattern and just keep adding bands as you please. The best part about this is that you can always start over, re-do it, change it, and add more colors as often as you like since they are not-permanent and won't leave any sticky residue like with Washi tape. The colors included in the box are red, pink, green, blue, yellow, white, and green. My first color combination was inspired by summer lemons and limes - just use green, yellow, and white. But don't stop there -- make friends and decorate your laptop charger too!
Refresh your mac chargers using colorful plastibands - no more washi tape!

This next color combination was inspired by a flavor I saw in a local Cambridge ice cream parlor called orange berry sherbert. Sweet and fruity! Happy summer decorating!
Refresh your mac chargers using colorful plastibands - no more washi tape!

Refresh your mac chargers using colorful plastibands - no more washi tape!

Friday Faves || #21 || Summer Sorbet Sweetness

Sunday, May 19


DIY || #21 | Crochet Floral Bathing Suit & BuzzFeed

Friday, May 10

DIY Floral Crochet Bathing Suit

So excited to announce a project I recently did for BuzzFeed this month! The new DIY section of BuzzFeed has been gaining incredible amounts of attention since it started and the authors were looking for some fresh bathing suit DIY projects. I was pleasantly surprised to be selected as a contributing blogger and whipped up what is now one of my favorite DIY projects thus far! This fresh, unique, and colorful DIY was inspired by the Mexican embroidery I love (it's everywhere in Southern California where I'm from...and my parents spent 10 years living in Mexico, so it's all around our house too!). I have nowhere near the skills (or time) to actually properly embroider anything, so I took a bit of a shortcut and used these amazing crochet flowers and leaves to mimic the effect. You can find a wide variety of handmade crochet items on Etsy, and I fell in love with HCK Crafts' flowers. Not only are they superbly made, but the maker - Michele - put together a custom order for me in one day...so I'm definitely going back for more. Plus, the six big flowers cost only $3 and the 12 leaves for only $2.50!! It was a match made in heaven for me. Anyways, check out my bathing suit DIY on BuzzFeed for the full tutorial, as well as to check out some other awesome bathing suit DIYs featured by Anna Evers at Plan B and Aimee at Clones N Clowns.


DIY Project || #20 || From Maxi to High-Low Skirt

Wednesday, May 8

Turn a long, maxi skirt into a trendy high-low skirt in under 5 minutes using basic supplies!
There's nothing better than a bright, bubbly, high-low skirt at the start of spring that cost you less than $10! Indeed, I purchased this skirt from a spunky vintage store in Boston a couple years ago and, until recently, actually put it to fashionable use. This post was one I originally did for I Like Fall at the end of last summer, but I love it so much I wanted to re-feature it here. It's super simply and easy to do if you have a long maxi skirt! Here is another great DIY high-low skirt tutorial I found super helpful from one of my favorite DIY bloggers, A Pair & A Spare. Her hem would work much better than the glue I used, but in case there are sewing-impaired ladies out there -- fabric glue is one heck of a best friend. Enjoy!
Turn a long, maxi skirt into a trendy high-low skirt in under 5 minutes using basic supplies!

Friday Faves || #17 || Royal Blue

Saturday, May 4


one | two | three | four | five


DIY Project || #19 || Mother's Day Gold & Floral Gifting

Wednesday, May 1

mother's day floral and gold gift wrapping
Mother's Day is just around the corner and I am loving all the beautiful gift ideas floating around the DIY blogosphere! In the spur of the moment, I decided to take a whack at my own mother's day gift wrapping and, as expected, veered towards floral and gold accents (there's something about me and gold if you couldn't tell already...my blog title is a lil' overboard...just maybe?). I saw these wonderful gold letter stickers at Blick's Art and Materials craft store in Boston and wanted to incorporate them somehow. With sticker letters, you can write messages on your wrapping paper specific to the mother, aunt, sister, friend, or grandmother that has had a special impact on your life. I chose the typical "love" message as my gift box was small, but a larger package would allow you to write several words. Well, that's enough chatter for now -- lemme show ya what I did!

Here are the materials you will need: small flowers (picked them from the street! yay for spring!), double-sided tape, gold sticker letters (find in craft or office supply stores), and plain wrapping paper.
mother's day floral and gold gift wrapping
The instructions are super easy and straightforward! After wrapping your present, decide on the word(s) you wish to use and start placing the golden letter stickers onto your packaging leaving a space to fit your floral accent bow.
mother's day floral and gold gift wrapping
Once satisfied with your gold letter placement, bunch together your flowers and leaves and tie together using a vibrant ribbon (I chose pink). Trim the ends so they are short. Attach a piece of double-sided tape to the top of the package and stick the floral bow onto it. Voila! All done! Now just wait and watch how troubling it will be for the recipient to take apart such lovely wrapping! Good luck, and Happy (early) Mother's day!
mother's day floral and gold gift wrapping